
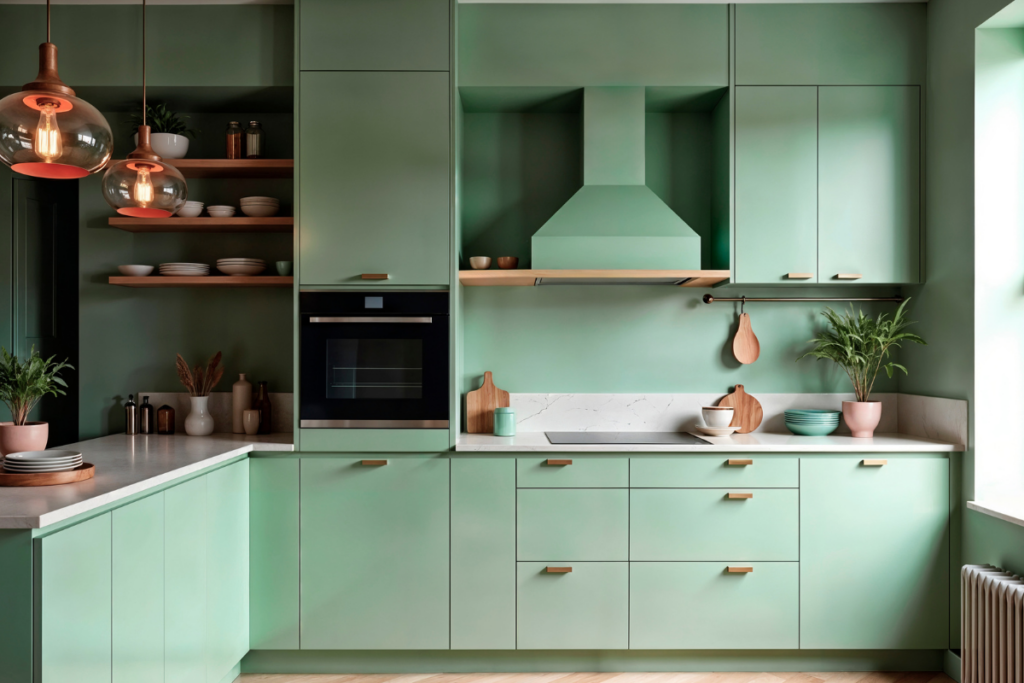
Kitchen cabinets often show their age before the rest of the kitchen does. The finish is starting to look worn around the handles, darker wood tones make the space feel dated, and daily use can leave doors, drawers, and edges looking tired, even when the cabinet boxes are still in good condition. In Victoria homes, coastal moisture, busy family routines, condo living, and older kitchen layouts can make cabinets feel dull long before they actually need replacing.
For many homeowners, a full cabinet replacement feels unnecessary when the layout still works, and the storage is practical. If the structure is solid, professional kitchen cabinet painting can be a smart way to refresh the kitchen without tearing everything out. It can brighten a compact condo, soften an older wood finish, modernize a rental suite, or help a home feel more polished before selling.
The real difference, however, is not just the new colour. For homeowners comparing kitchen cabinet painting companies in Victoria BC, the value comes from proper preparation, the right coating system, careful application, and a finish that can stand up to everyday use. This guide explains how the process works, what homeowners should expect, and why prep matters more than anything else.
What Should Homeowners Know First?
Cabinets take more daily abuse than most homeowners realize. Doors get opened with wet hands, drawers are bumped during busy mornings, grease settles near the stove, and steam from cooking can slowly wear down the finish. Over time, this can leave cabinets looking dull, sticky, chipped, or dated, even when the kitchen itself still functions well.
That is why cabinet painting is more detailed than painting a bedroom wall. Cabinet surfaces are touched daily and need to withstand moisture, cleaning products, food splatter, and frequent opening and closing. A lasting result depends on the condition of the cabinets, the surface material, the products used, and how carefully each step is completed.
In Victoria, Nanaimo, and Vancouver homes, cabinet materials can vary widely. Older homes may have wood doors with visible grain, while newer condos may have laminate or MDF surfaces. Rental properties may also have cabinets that have already been painted once, which can make preparation even more important. Each surface needs the appropriate cleaning, sanding, priming, and coating before paint is applied.
How Does the Process Work?
Homeowners often search for step-by-step instructions on painting kitchen cabinets to understand what happens behind the scenes. A professional process is not rushed. It follows a clear order, so the final finish looks smooth, consistent, and durable.
Step 1: Consultation and Finish Planning
The process starts with a conversation about the kitchen, the condition of the cabinets, and the homeowner’s goals. Some clients want a soft off-white to brighten a shaded Victoria kitchen. Others prefer warm greige, deep green, navy, charcoal, or a two-tone look with darker lowers and lighter uppers.
This is also the stage where sheen matters. Satin and semi-gloss finishes are commonly considered because they provide a balance of durability and cleanability without looking too shiny. Colour should be selected with the home’s lighting in mind. A colour that looks warm in a Vancouver showroom may look cooler in a north-facing kitchen in Saanich or Nanaimo.
Step 2: Hardware Removal and Labelling
Cabinet doors, drawers, hinges, and hardware should be removed carefully and labelled. This keeps everything organized for reinstallation. Even cabinets that appear identical can sit slightly differently, so proper labelling helps avoid alignment issues later.
This step also allows the painter to work more precisely. Doors and drawer fronts can be finished evenly, while cabinet frames can be prepared and painted in place with surrounding surfaces protected.
Step 3: Cleaning and Degreasing
Kitchen cabinets collect more residue than most homeowners realize. Cooking oils, steam, fingerprints, dust, and cleaning sprays can sit on the surface and interfere with adhesion. Paint applied over residue may look fine at first, but it can chip, peel, or cure unevenly.
A thorough cleaning removes grease and buildup before sanding begins. This is especially important around handles, above the stove, near the dishwasher, and on lower cabinets where hands frequently come into contact with the surface.
Step 4: Sanding and Surface Repair
Sanding is not about stripping the cabinet to bare wood in every case. It is usually about dulling the surface so the primer can grip properly. Glossy cabinets, previously painted doors, and smooth factory finishes need careful abrasion.
Small dents, cracks, gaps, or old hardware holes may also be filled at this stage. If the homeowner is changing pulls or knobs, the painter may need to fill the old holes and prepare the new holes. This creates a cleaner, more intentional finished look.
Step 5: Priming for Adhesion
The primer is one of the most important parts of the project. It helps paint bond to the cabinet surface and can block stains, tannins, or old colours from bleeding through. The wrong primer can lead to poor adhesion, especially on slick surfaces.
A professional painter will choose a primer based on the cabinet material. Wood, MDF, laminate, and previously painted finishes do not all respond the same way. This is one of the main reasons homeowners choose experienced kitchen cabinet painters over treating the project as a weekend wall-painting task.
Step 6: Painting and Smooth Application
Once the surface is cleaned, repaired, sanded, and primed, the finish coats can be applied. The goal is an even, smooth finish with consistent coverage across doors, drawers, and frames.
A professional application may involve brushing, rolling, spraying, or a combination, depending on the project setup. Spraying often creates a smoother, more refined finish on doors and drawer fronts, while detailed frame areas may need careful handwork. The key is consistency. Uneven coats, heavy edges, or visible brush marks can make freshly painted cabinets look less polished.
Step 7: Drying, Curing, and Reinstallation
Cabinet paint needs time to dry and cure. Dry-to-touch does not mean fully hardened. Homeowners should be careful during the first few days after completion, especially around handles, corners, and high-use drawers.
Once the finish is ready, doors and drawers are reinstalled, hardware is attached, and alignment is checked. A final walkthrough allows the homeowner to review the finished work and request any small touch-ups before the project is considered complete.
What Is the Best Paint?
Many homeowners ask about the best paint for kitchen cabinets in Victoria homes because they want a finish that can handle real life. The best choice is usually a durable cabinet-grade coating that offers strong adhesion, washability, and resistance to everyday wear.
The product should be selected based on the cabinet material, the existing finish, the preferred sheen, and the amount of use the kitchen receives. A busy family kitchen may need a tougher coating than a lightly used secondary suite. A bathroom vanity may need better moisture resistance than a built-in storage unit in a hallway.
For coastal BC homes, product quality matters. Humidity, seasonal dampness, and frequent cleaning can all affect how painted surfaces perform. Low-VOC options may also be preferred for households with children, pets, or anyone sensitive to strong odours. The right product should create a hard-wearing finish while still looking refined and comfortable in the home.
Cabinet Refinishing or Replacement?
Cabinet refinishing is often a practical middle ground between living with a dated kitchen and paying for a full replacement. It makes sense when the cabinet boxes are sturdy, the layout works, and the homeowner wants a fresh look without changing plumbing, flooring, countertops, or appliances.
Replacement may be better if the cabinets are water-damaged, poorly built, warped, or no longer functional. However, many Victoria and Nanaimo homeowners find that their cabinets are structurally fine but visually outdated. In these cases, painting can deliver a strong transformation while reducing waste and avoiding the disruption of a larger renovation.
For homeowners preparing a home for sale, painting cabinets can also help the kitchen feel cleaner and more current in listing photos. For homeowners staying long term, it can make the space feel more personal without tearing out what already works.
What Mistakes Should Be Avoided?
The most common mistake is rushing the preparation. Skipping cleaning, sanding, or priming can shorten the lifespan of the finish. Cabinets are high-touch surfaces, so paint needs a properly prepared base.
Another mistake is choosing a colour without testing it in the actual kitchen. Light changes throughout the day, especially in homes near trees, shaded lots, or ocean-facing windows. A sample that looks perfect online can feel too cool, too yellow, or too stark once it is installed in a kitchen.
Homeowners should also avoid using basic wall paint on cabinets. Cabinet surfaces need a tougher coating than drywall. Using the wrong product can lead to sticky doors, early chipping, or poor cleanability.
Finally, hardware should not be treated as an afterthought. New handles, pulls, or hinges can complete the transformation, but they need to suit the cabinet style and be planned before holes are filled or drilled.
What Sets Our Painting and Staining Services Apart
When your business or property needs a cleaner, more polished look, the finish matters. Peeling stain, faded wood, marked walls, and worn surfaces can affect how customers, tenants, employees, and visitors see your space. Our team provides professional painting and staining services designed to improve both appearance and durability, whether you need wood staining, interior painting, exterior painting, or commercial painting support.
We specialize in staining decks, fences, wooden furniture, and other wood surfaces, using careful preparation and product selection to protect the material while enhancing its natural beauty. For commercial spaces, we focus on clean lines, smooth finishes, and a professional result that reflects your business standards. We also offer low-VOC and eco-friendly paint options to support safer indoor environments for your staff and clients.
Our service areas cover communities across British Columbia, including the Lower Mainland, Fraser Valley Regional District, Sea to Sky, and Vancouver Island. We proudly serve Vancouver, Richmond, Coquitlam, Pitt Meadows, Surrey, North Vancouver, Burnaby, Port Coquitlam, Maple Ridge, Langley, West Vancouver, New Westminster, Port Moody, Delta, White Rock, Abbotsford, Hope, Chilliwack, Mission, Squamish, Whistler, Victoria, Courtenay, Nanaimo, Campbell River, and Port Alberni.
Whether you are refreshing a commercial space, protecting exterior wood, or updating a high-traffic property, our skilled team brings attention to detail, reliable workmanship, and a commitment to long-lasting results.
To discuss your painting or staining project, call (250) 580-8111.
Where Does This Fit Locally?
Homes across Victoria, Nanaimo, and Vancouver often have different cabinet needs. A downtown condo may need a sleek, modern finish that makes a compact kitchen feel brighter. A family home in the Westshore may need durable cabinets that can handle kids, pets, and constant use. A character home near Oak Bay or Fernwood may need a colour that respects older trim, flooring, and natural light.
Brilliant Brush Painting also offers broader residential painting services for homeowners planning other updates. If cabinets are part of a larger interior refresh, the team can help connect cabinet colour with wall colour, trim, and overall flow. For homeowners updating nearby rooms, their residential interior painting service can support a more complete transformation.
For local visibility and service-area relevance, the company also maintains a dedicated Victoria painting location page, which helps homeowners understand the range of services available in the region.
Final Thoughts
Painting kitchen cabinets is one of the most noticeable ways to update a home without committing to a full renovation. Done properly, it can brighten the kitchen, modernize the space, improve resale appeal, and make everyday living feel more enjoyable.
The key is to treat the project with the care it deserves. Cabinets need cleaning, sanding, priming, the right products, controlled application, and enough curing time. A rushed job may look fine for a few weeks, but a carefully completed project is built for daily use.
For homeowners in Victoria, Nanaimo, and Vancouver who want a refined cabinet refresh, Brilliant Brush Painting offers the precision, communication, product knowledge, and customer-first approach needed for a smooth experience. Reach out to request a free estimate and talk through your kitchen goals with a team that understands how local homes are lived in, used, and updated.
FAQs
Is painting kitchen cabinets worth it?
Yes, painting kitchen cabinets can be worth it when the cabinet boxes are solid, and the layout still works. It gives the kitchen a refreshed look without the higher cost, waste, and disruption of full cabinet replacement.
How long do painted kitchen cabinets last?
The lifespan depends on preparation, product quality, application, and daily use. Professionally painted cabinets, when properly cleaned, sanded, primed, and cured, can hold up well when cared for properly.
Can all cabinet materials be painted?
Many cabinet materials can be painted, including wood, MDF, and some laminate surfaces, but each requires the right prep and primer. A professional assessment helps determine whether painting is suitable for your specific cabinets.
How do I maintain painted cabinets?
Use gentle cleaning products, avoid harsh scrubbing, and wipe spills or grease quickly. During the first few weeks, treat the cabinets carefully while the finish continues to cure and harden.